
Porche City Market :: our Costco playhouse makeover
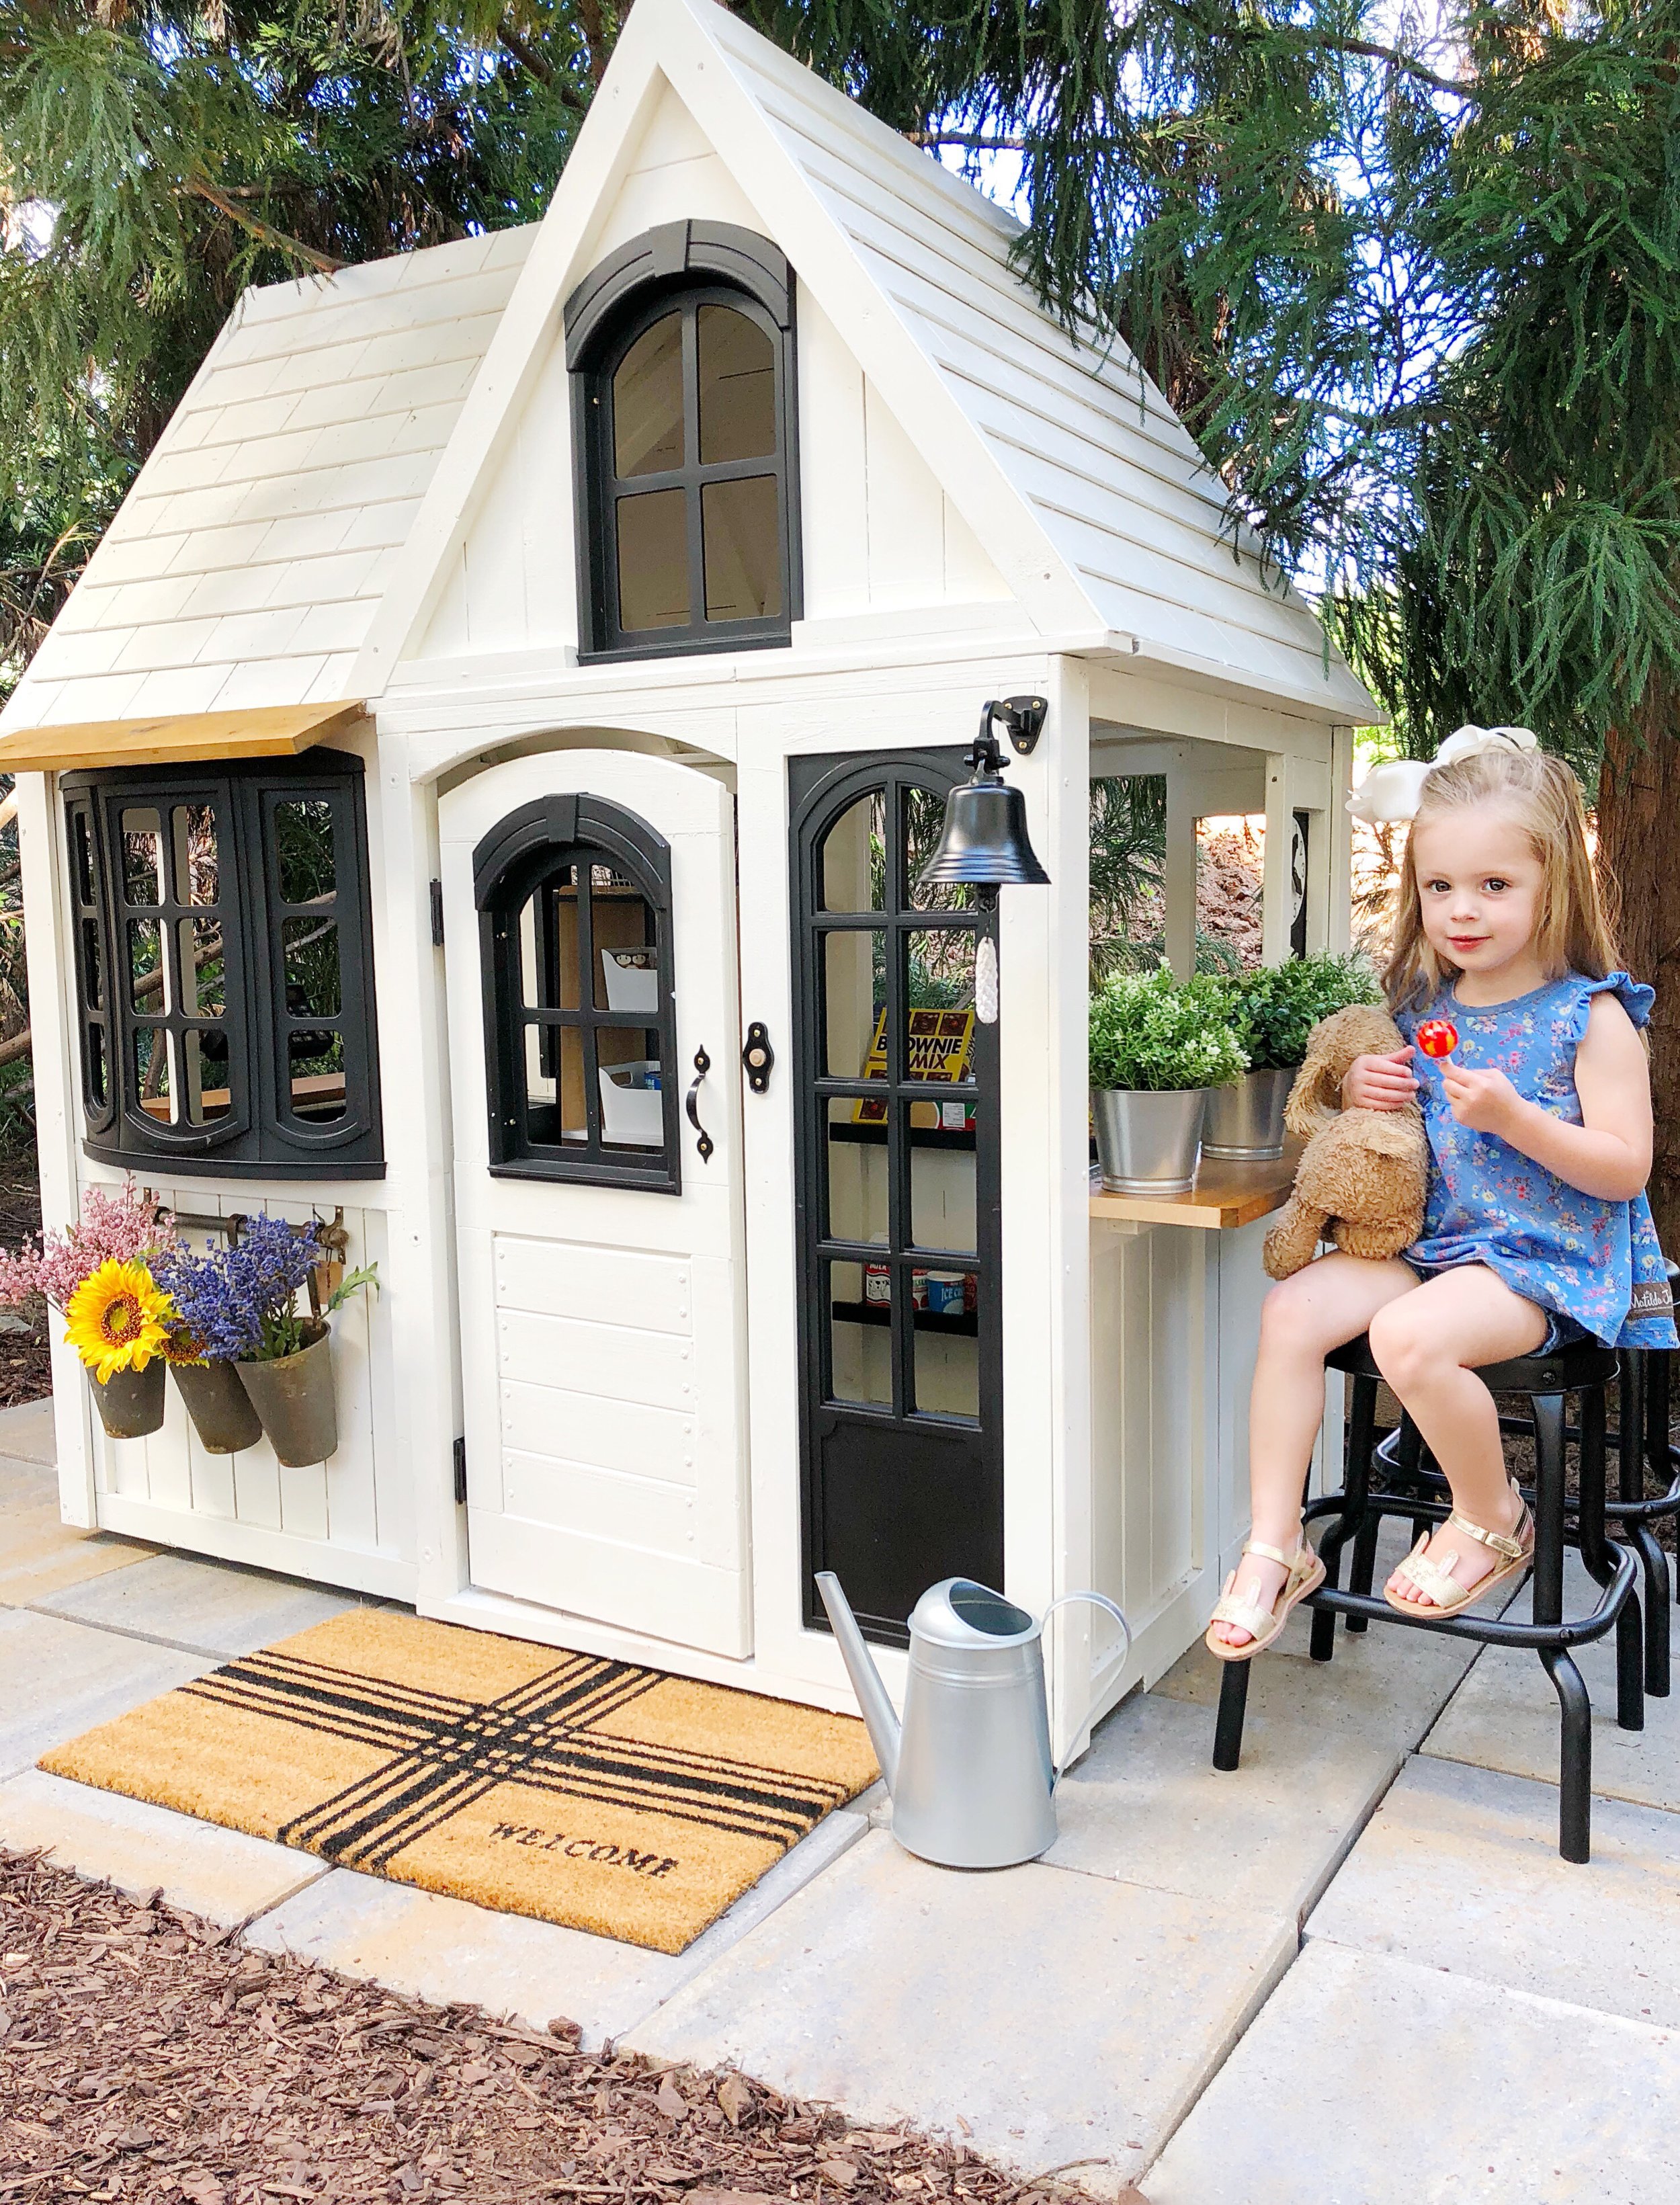
So glad you stopped by to learn more about Porche City Market! This was one of my favorite projects to date in our new house. Now that we have most of the larger indoor projects wrapped up, I was able to carve some time out to make something fun just for the girls! The playhouse at first was located outdoors for a few months…until we quickly realized it wasnt getting the use we wanted it to AND the weather (torrential rain) was ruining it! Sooo we quickly moved it inside…and I re-did our whole playroom to be a marketplace ;) Below are some outdoor pictures so you can see how it was initially “renovated” and HERE are photos of it now in the playroom…I mean marketplace and how it ended up in our house!
You can find all of the makeover details and sources for Porche City Market below!
We ordered the playhouse online from Walmart. Our exact one is the Cedar Summit Greystone Cottage but it appears to have been discontinued. The KidKraft Forrestview II playhouse is super similar. I researched outdoor playhouses for about a week (while selling some of my girl's boutique clothes to fund it)! I was definitely on a budget, but after I decided I wanted to make the girls a "market" instead of a house, I had a pretty specific vision for what type and size playhouse I needed. This one was only $299 with free shipping and I loved the high ceilings so even my 5.5 year old will be able to comfortably fit inside for years to come!
Here are a few other adorable and reasonably priced ones that I found and would be SO cute renovated- Option 1 ($259), Option 2 ($349), Option 3 ($599)…this one is already a little market!!
As our "play" area is all mulch, I really wanted the house to be on a sturdier (and cleaner!) platform. We found these cement 12"x12" pavers at Home Depot for only $1.40/ea. My husband leveled out the area and they went down pretty easily. There are some awesome plastic resin 24"x24'' pavers that I LOVED, but they are A LOT more $$ so we decided to go with the cheaper option!


Here it the playhouse right after my husband took it out of the box and put the roof on it. The base came assembled as well as the big pieces of the roof, so everything was pretty easy to "attach" together.
It took my husband about 2 hours to put everything together by himself. Originally the house was a dark wood color and all of the windows were white.

I chose to paint the house the color of our real house- Sherwin Williams Dover White. We sprayed the windows with Rustoleum black flat spray paint that bonds to plastic very well. I highly recommend this over paint. I learned the hard way that paint won't adhere well to plastic and will chip and peel very easily. Spray painting is also WAY faster. My husband did the first coat of the house with his paint sprayer. Then I went behind him and did two more coats with a paint brush. This was the LONGEST part- painting the house took about 9 hours! I had white paint in my hair for at least a week! (*definitely wear a hat if you are painting the ceiling of a playhouse or your hair will be COVERED*)
Thankfully my husband is pretty handy, so he was able to quickly cut the shelves and the awning that I was envisioning. The playhouse came with smaller "shelves" on the two big side windows, but I wanted a bigger space so the kids do more with them. He rounded the corners of the shelves to remove any sharp corners. The awning is pretty much just a piece of wood angled at the front and installed at an angle. I stained them with Varathane Early American wood stain then we sealed them with a wood sealant spray.


In order to make the "market" really come to life, I ordered a Melissa & Doug grocery store checkout lane. It has GREAT reviews and ya'll, it does not disappoint!! I decided to paint all of the dark green accents on this piece black to match the windows, but it really is SO cute just like it comes. The scanner makes noises and has a red light just like a real one. The conveyor belt "works" by twisting a knob so the items will come down it just like a real checkout! It has a money drawer, calculator, and you can even insert a "chip" credit card or swipe one. I bought little tubs from IKEA to go in it to keep the food items more organized.


The stools on the side are from IKEA. I wanted stools that would hold up in bad weather and these seem pretty durable. The faux plants and watering can are from IKEA too- SO many good and affordable finds there for this project!
The house comes with a doorbell, but I really wanted an old fashion "dinner" hanging bell too. I found this one on Amazon and it's just perfect! The girls are obsessed with ringing it- maybe a little too much ;) I also think this mailbox would be so cute to add!


I am still waiting on the "open/close" door sign to complete the market, but then it will truly be finished (but ill always be on the lookout for some cute durable food items to fill the shelves)! We also got a set of walkie talkies that the girls love using to take our "to-go orders" we can't wait for the memories that will be made in here for years to come!
Oh I almost forgot! We named it "Porche City Market" after Ponce City Market in Atlanta- an iconic indoor/outdoor modern marketplace with a lot of shops, restaurants and even a rooftop bar/mini golf/carnival area. Ponce City Market was a renovation itself of the old Sears, Roebuck & Company building :) If you ever visit ATL, I would highly recommend a trip to visit PCM!
Well that is about it :) I hope you enjoyed the tour of Porche City Market and maybe feel inspired to attempt a fun playhouse makeover of your own! Read more on indoor playhouse post where I list even more sources on how to create your own kid’s own indoor farmhouse market!