
PORCHE & CO. :: How to Create the perfect Gallery Wall
There are many reasons why you should love gallery walls! It's an expression of art in your home but it is also a beautiful expression of your personality & style. Today, I want to give you some principles on how to decorate a gallery wall using frames to your liking.
First, I recommend you decide on your purpose / theme. Are you wanting to tell a story about your kids? Your love for botanicals, patterns or fabrics? Or want an eclectic wall of cool art or photos? Or do you want a more traditional formal gallery wall full of frames? Whatever it may be, start there...determine your theme. Remember, gallery walls are a representation of your style, wants for the space and/or personal interests.
Next, choose a pattern for your wall. Do straight lines attract you? More modern styles usually do 9-, 6- or 3-frame patterns with clean lines. But, mismatched frames or wall art are also a continued trend especially with farmhouse style homes. Mixing metal art/frames with vintage frames or wood accents is a trend that is seen quite often. If you’d like to keep your gallery wall more formal (we tend to do this ourselves over here at Porche & Co.) stick to utilizing frames only. For a more traditional classic look, utilize frames with the same finish. Varying the sizes will add some playfulness to the gallery, but utilizing the same sizes will retail more formality & simpleness. You can also utilize frames with different finishes and textures to spice up the gallery wall and give it a more fun & modern flair. At Porche & Co. we tend to utilize frames of the same finish and often sizes to create a simple classic statement.
Favorite Gallery Wall Frames

Once you pick the pattern, you will need to decide on how close together you want the frames to be. A popular trend right now are frames that are hung closer together to allow more frames on a wall. Some patterns go beyond the 9-frame and fill a whole wall. I, personally, like more simplistic, modern patterns for a classic look. If you are ever unsure, I recommend that you do a 6-frame pattern to start.
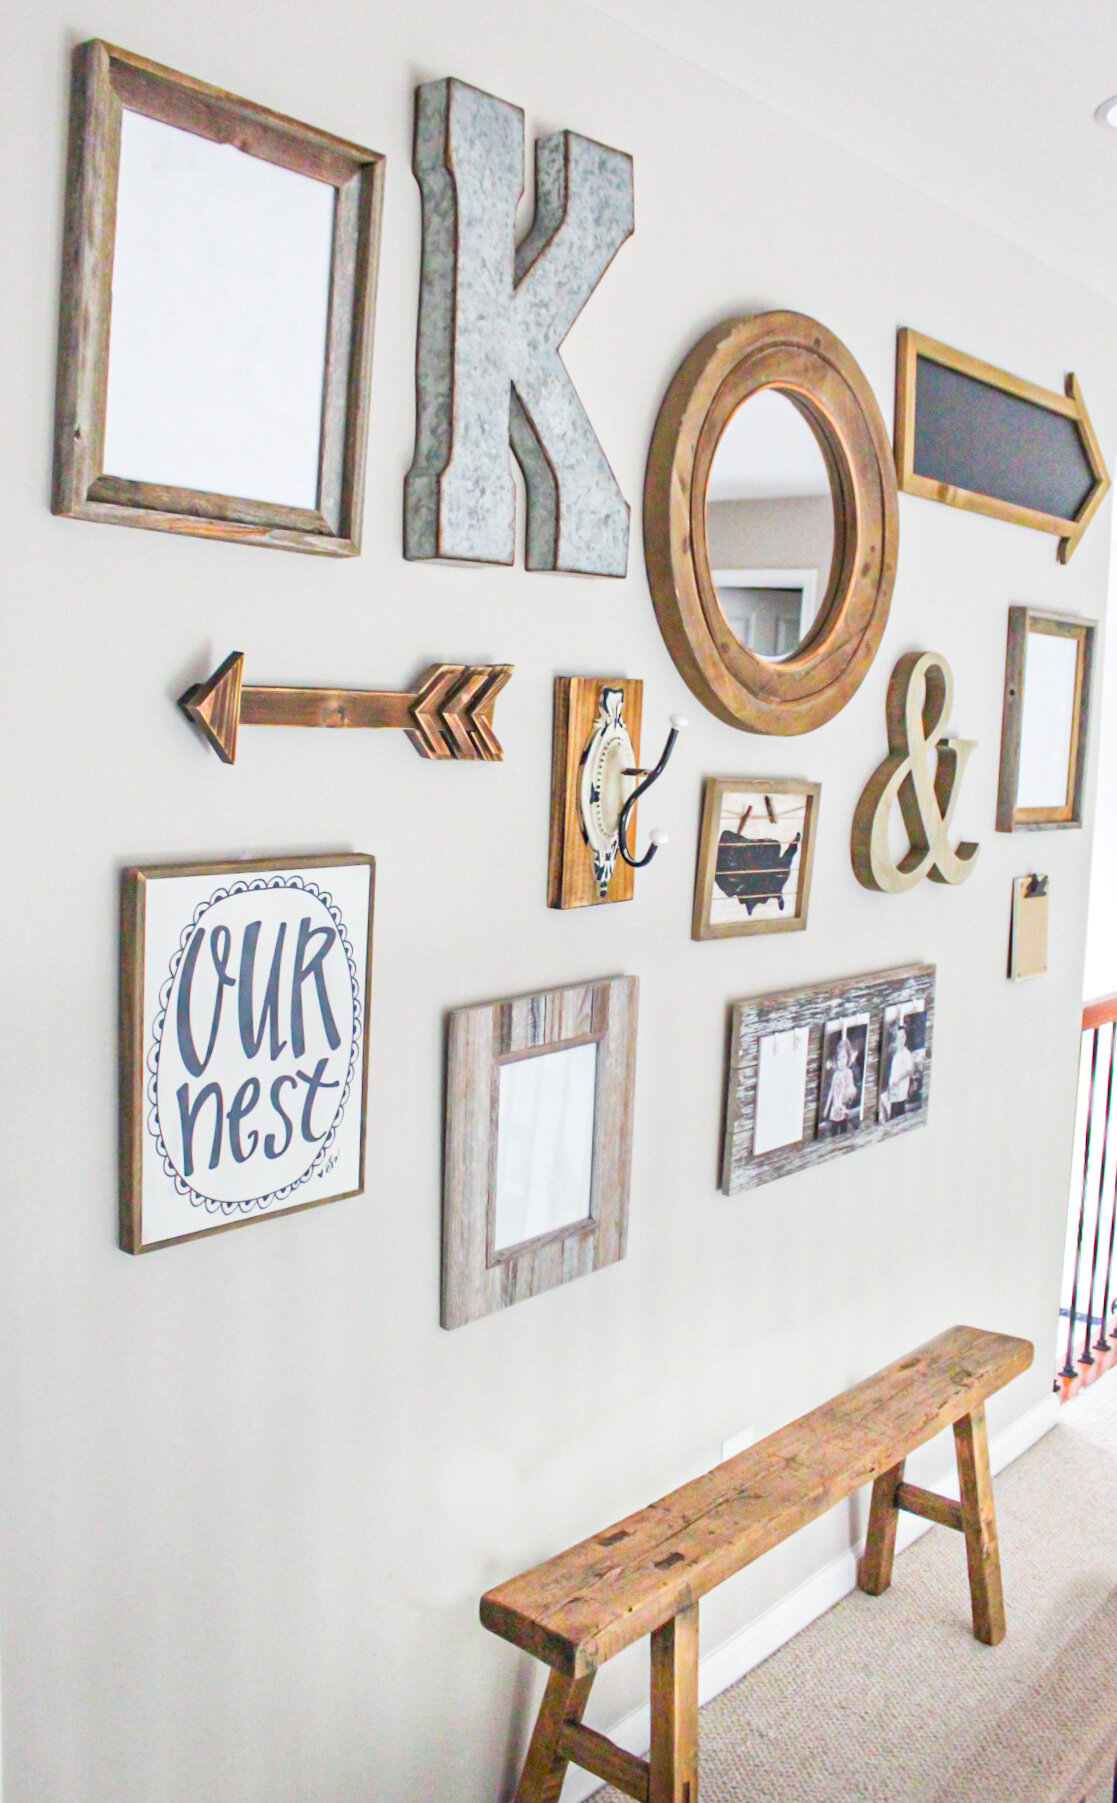
Another example is the farmhouse style art wall, which usually consists of variety of wood and/or textured pieces versus picture frames. If well done, it is appealing to the eye and can truly look like art in your home.
FRAMES & MATS::
Once you decide on your gallery wall pattern, its time to look for frames. Don’t make this a long, drawn out process. Make it simple. Either choose one cohesive color or pick 2-3 (ie. gold, white and black). Then, buy your frames in the sizes that you chose.
Next…choosing mats for your frames for your gallery wall is just as practical as it is aesthetic. If you are looking for clean, modern look, keep it simple with white. White will enhance the colors in a piece of artwork, or make a black & white picture pop. You always want to make sure that the matting complements rather than commands the artistic flair of the wall. Neutral tones are easy to work with, and are considered more classic. Fabric or textured mats are more of a modern traditional look and more expensive. But, hey, if you like color in your home, have fun with this project and mix in some colored frames.
Now trending in more modern homes are white, black, bronze and white oak frames. They are very popular right now but there’s nothing wrong with mismatched frames if you rather have a more eclectic gallery wall. Eclectic designs are more for artistic, mid-century or even farmhouse styles.
Here is a matted simple gallery wall that we designed for a client in 3D complete with farmhouse style sconces above!

HANGING PROCESS::
Gather your supplies: measuring tape, level, pencil, hardware (nails, wall anchors or picture hangers), hammer, craft paper and paint tape.
Before you start hammering nails in the wall, mock up the placement on the ground by placing the frames in the order of your pattern choice . For the 9-, 6- and 3-layer walls, I recommend laying the frames on top of craft paper, tracing the frames and cutting them out so you have a template frame to put on the wall for each frame. Once the templates are cut out, you can use painters tape to hold the templates as placeholders on the wall and give you a visual of what your gallery will look like. This will allow you to measure, level and mark nail holes.
For a eclectic gallery wall: I highly recommend you start with the most central or largest piece(s) of artwork first, then build the gallery around that central piece. This is more of a freeform gallery wall so you do not need to use templates for this. One principle you want to always want to keep in mind is that the frames should be about two inches apart from one another. To make the gallery wall look balanced, avoid placing some frames close together while others are more spread apart. The beauty of this design is that you can keep adding to it over time. Some can fill a wall top to bottom.
For a grid gallery wall: I highly recommend you start by measuring out the space you'll need for the entire display on your wall, being sure to factor in evenly spaced gaps between each frame. Use the template to plot out where each frame will go on the wall, making a small pencil mark at the top center of each frame's position. With each spot clearly marked, you can be confident when you go to pick up the hammer and nails.
Having a visual will give you confidence and allow you to have a vision of what the wall will look like when it’s done. Now, trust your gut and have fun doing it.
Easily shop these products in this post by clicking on the image or carousels above!
You can find sources to my designs and home decor favorites linked directly above and on my LIKEtoKNOW.it page.
Be sure to “Follow” to stay up to date on everything Porche and Co. & The Porche Place!
**This Post Contains Affiliate Links**

Do you love what we did with this space? Do some rooms or spaces in your house need some designer help but you aren't sure how to get started?
Check out our various Packages through the link below & let's get started designing your dream room(s) today!
Follow these 3 easy steps to get started today:
1. Select the E-Design package from that best works for your design needs
2. Complete the short Client Design Questionnaire on each space
3. Sit back and watch your dream home come to life!
You will have direct access to your designer through messenger throughout the whole process.
Multiple revisions are included with each package to ensure you are completely happy with the end result!

