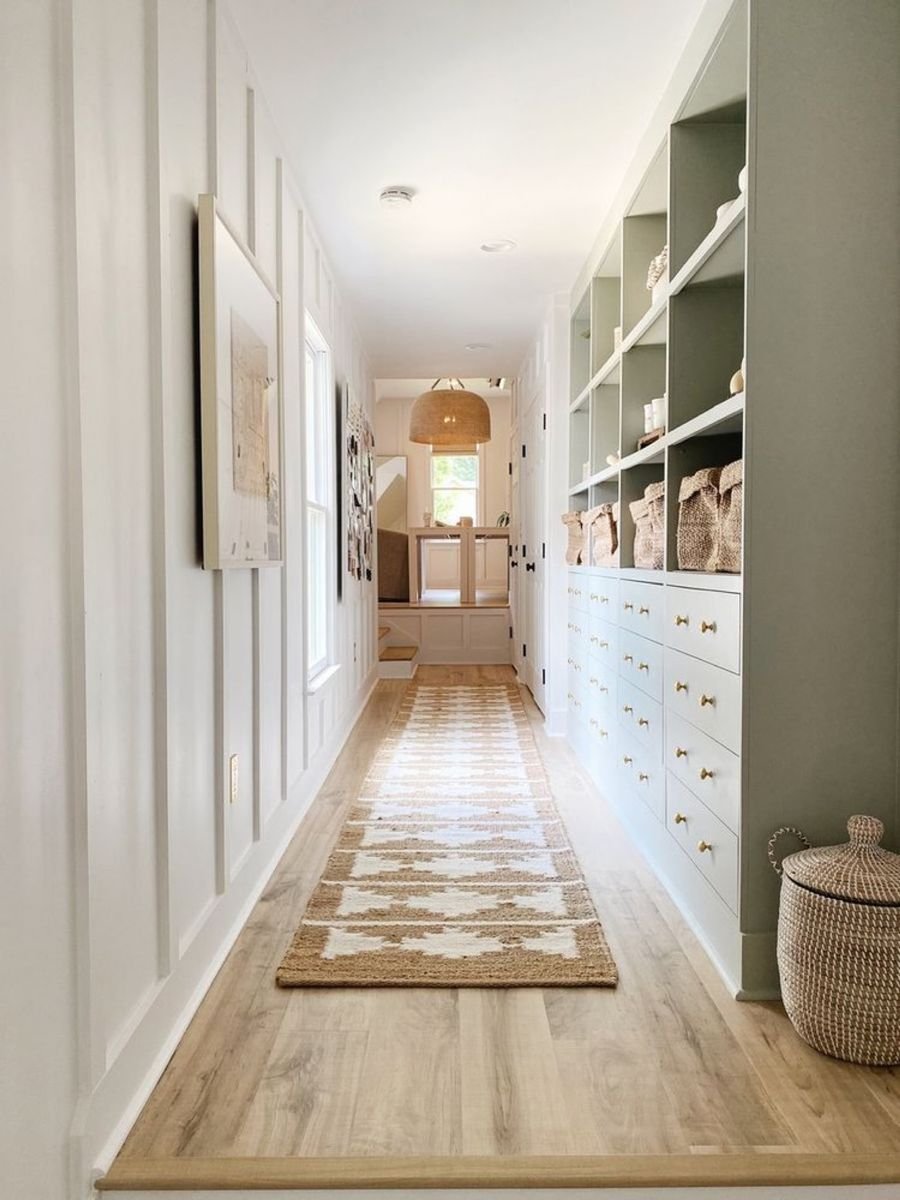
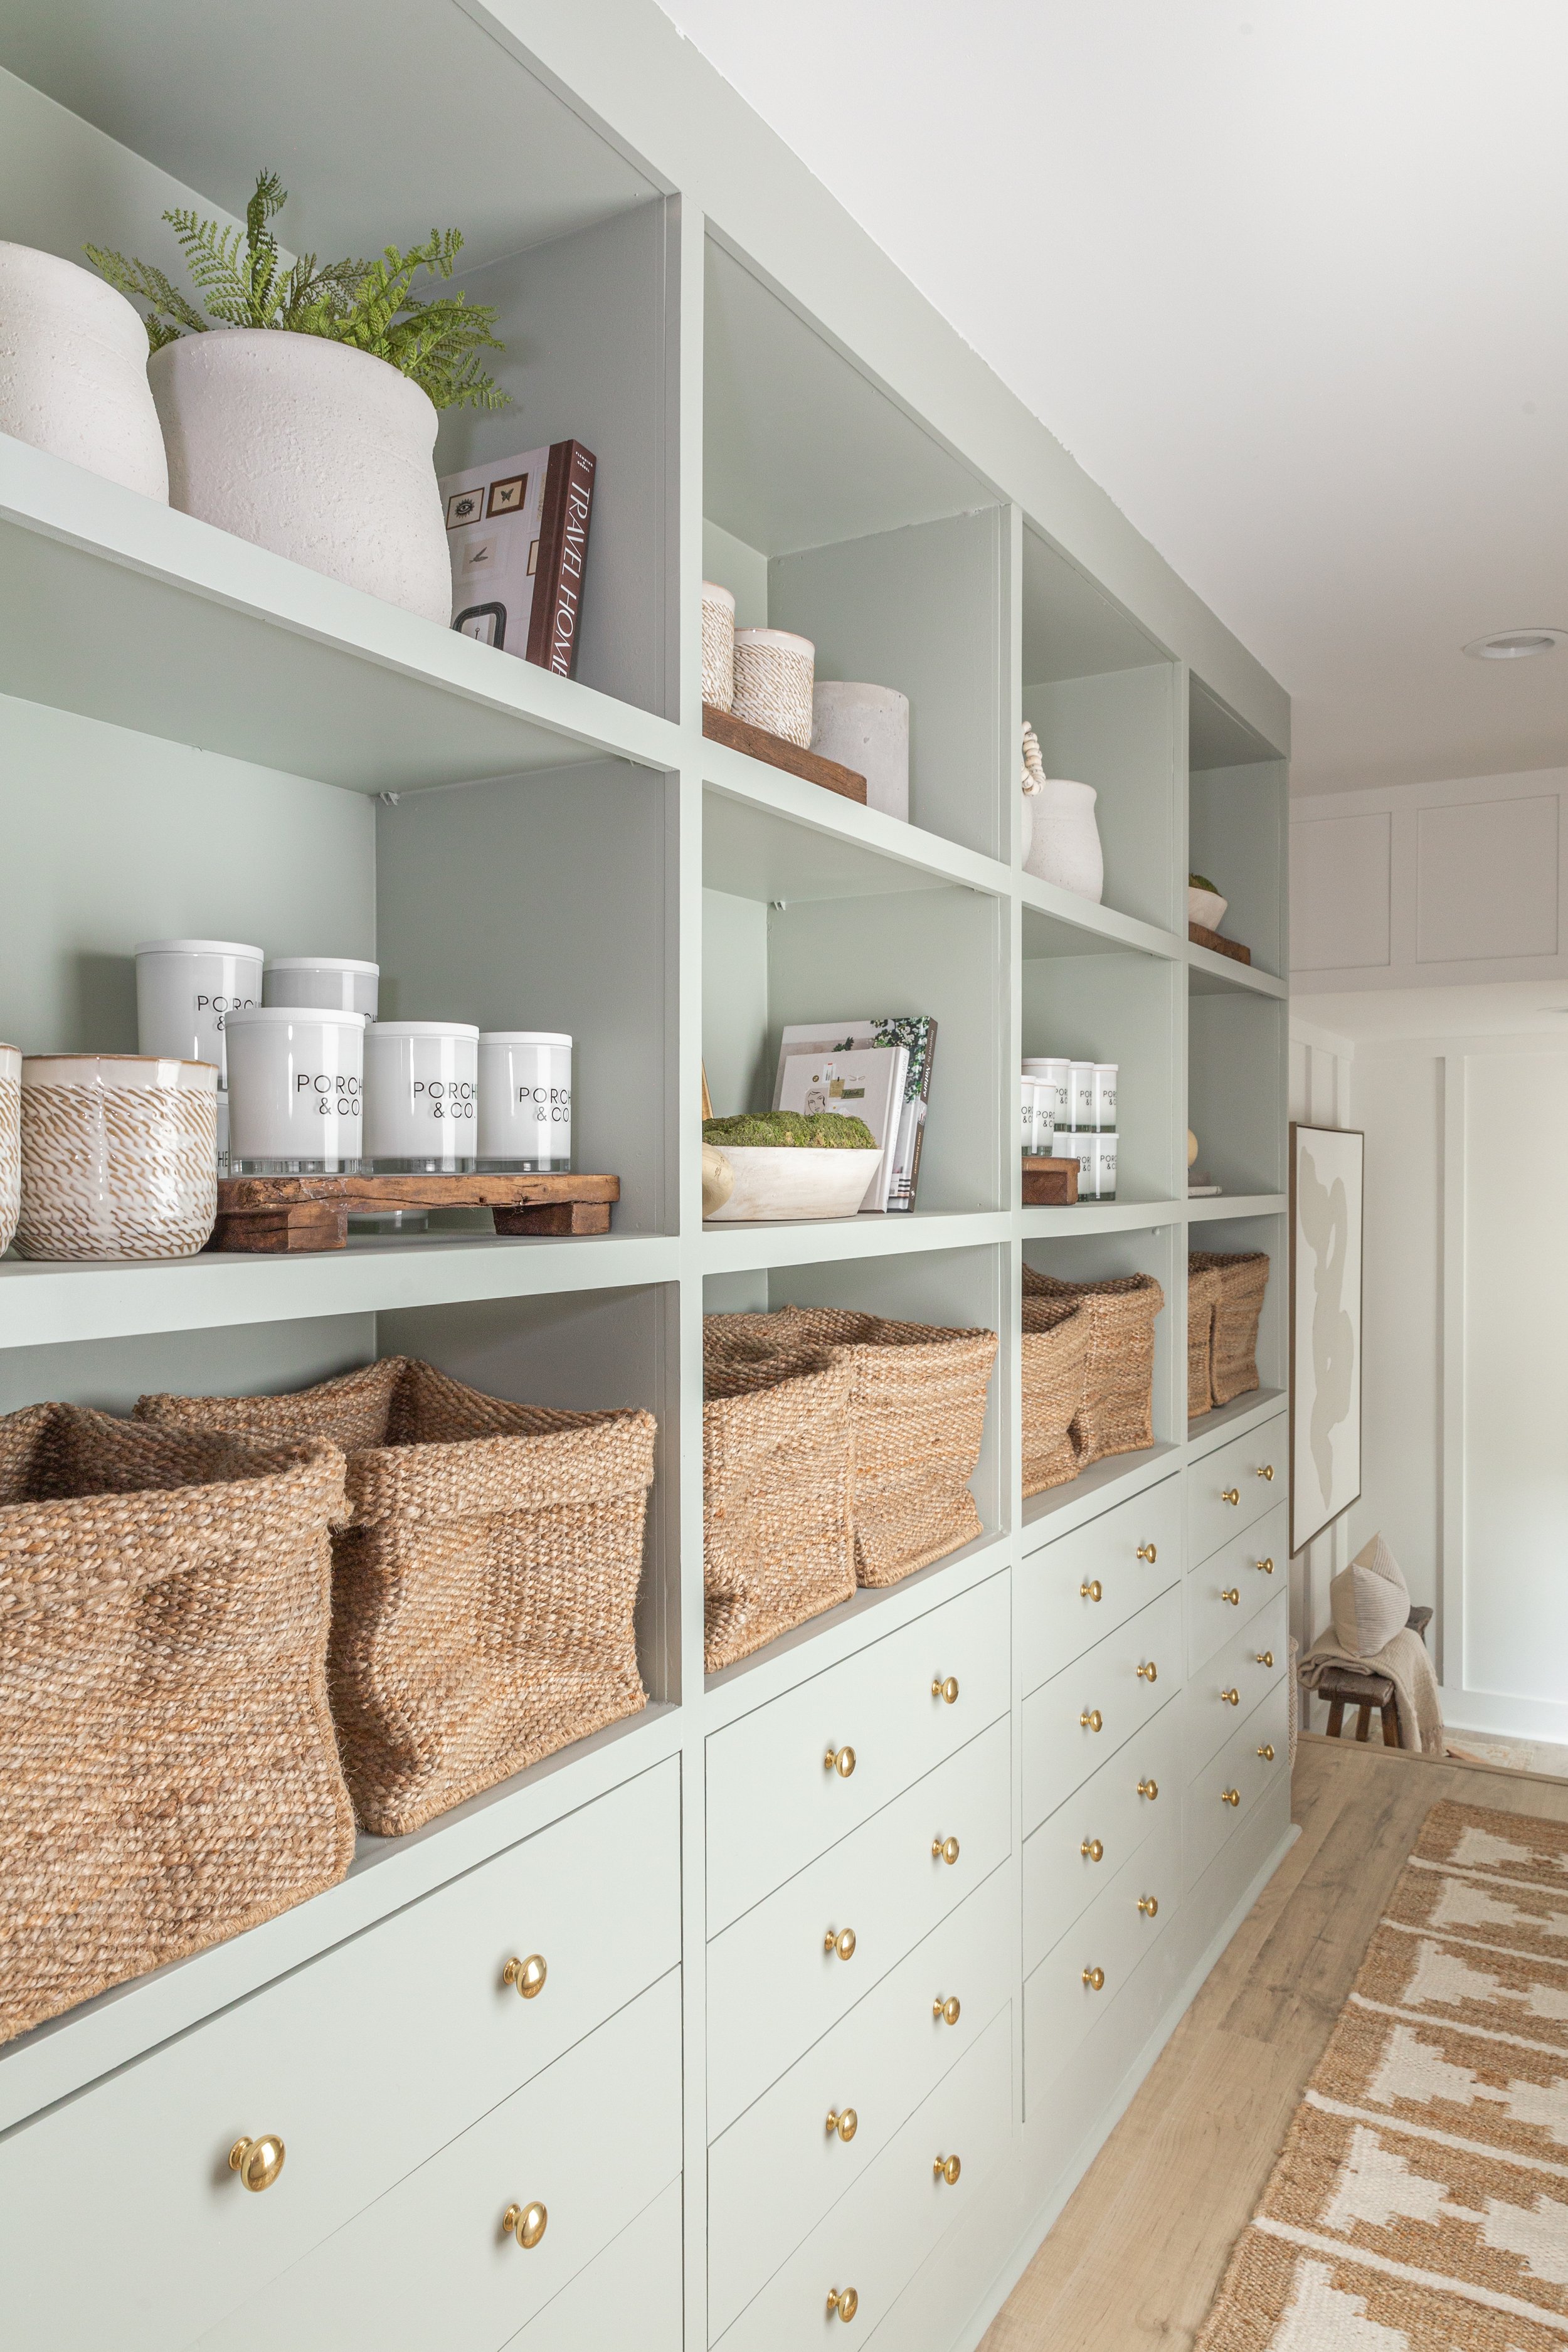
IKEA Bookshelf Hack :: Our studio Built-Ins using the pax Wardrobe System from IKEA
i am so excited to finally be sharing a more in depth explanation on our diy ikea bookshelf built-ins…I know this has been a long awaited blog post! as we were building out the design studio last year IN MY HOME, i briefly shared the process and some behind the scenes on my Instagram (i have a reel on my instagram if you want to see more behind the scenes of the process), but i promised to give you all an in depth EXPLANATION of everything we did and how we did it on the blog. iN THIS POST, I AM ANSWERING all of your questions on how we completed this amazing hack.
When we started building out the studio, i knew i wanted built-in bookshelves to display home decor, our porche & co candles, and for extra storage. PROFESSIONAL built-ins can be so expensive. LUCKILY I HAVE A VERY HANDY HUSBAND THAT WAS UP FOR A PROJECT. i had seen a few people share the diy ikea bookshelf hack ON THEIR BLOGS SO WE DECIDED TO GIVE IT A GO ourselves. MY HUSBAND WANTS to make sure that i GIVE THE DISCLAIMER THAT This wasn’t a quick and easy diy project, but it was 100% worth it! HE IS VERY HANDY AND ALREADY HAD A LOT OF THE TOOLS TO complete THIS- IF THIS IS NOT THE CASE FOR YOU IT MIGHT BE A HARDER DIY TO COMPLETE. i am so in love with how they turned out and would definitely recommend this hack if you are up for the challenge and looking to save some money!
Materials ::
We purchased and put together the following IKEA items: (4) ‘pax’ wardrobe systems (16) ‘komplement’ drawers, 32 brass knobs.
Other items we used: 1×10 MDF trim for top; 1×6 MDF trim for sides; 1×4 MDF trim for between each shelf; 2x4s & OSB crown molding for top; SHERWIN WILLIAMS SOFT SAGE emerald designer edition paint, Sherwin Williams extreme bond primer. (I have been getting a lot of questions on the runner, so linking it here! It comes in a lot of different lengths as well as a black option!)
THE PROCESS ::
we began by putting the IKEA wardrobe systems together right beside each other in the hallway. we replaced the original wood wardrobe backing that they come with originally with thicker plywood to give them a more sturdy backing. after they were together and the new backing was on, we spaced them evenly along the wall leaving a gap for the 1” piece of trim that would soon go on top to create a flush frame.
After measuring and re-measuring to ensure they are evenly spaced correctly, the shelving pieces are ready to be installed. we decided to use two shelves and space them evenly. we then installed trim pieces on top of the newly installed bookcases to cover any gaps and create a “flush” seamless appearance like custom built-ins. We used 1” thick trim pieces cut to size to go over the entire “face” of the bookshelves including the top, bottom and middle of each section.
We installed the drawers in the bottom section and cut 1” faceplates for each drawer. It is important that these are cut very precisely so they will also be in line and flush with the rest of the 1” trim pieces. We used small screws to fasten these to the original drawer fronts (pictured below) while using clamps so secure the fronts as we drilled the screws in.
We then got to work with the wood filler filling in all of the holes for the shelves in the top portion of the book shelves. We used caulk to fill in any “seams” in the top shelving section. We decided to add a small piece of shoe moulding to where the bookshelves meets the wall so there would not be any gaps here and caulked this piece as well.
We filled all of the holes for shelves that come pre-drilled from IKEA to give it a more custom seamless finish. This obviously means we will not be adjusting the shelves. this part is optional, but if you do want it to look like a custom built-in, i would suggest not skipping the step!
The shelves were finally ready for paint! We painted everything with our paint sprayer to give it a more even finish. the paint color i used is sherwin williams soft sage which is part of their designer emerald collection. the color is so beautiful next to the studio walls (they are painted in sherwin williams snowbound).
For the paint, it is VERY important to use a primer that will adhere the paint to the shelves. I spoke in depth with the Sherwin Williams store manager who told me to use ‘EXTREME BOND PRIMER’ BEFORE WE APPLIED THE PAINT. IT WILL NOT ADHERE PROPERLY IF YOU SKIP THIS STEP.
ONCE THE SHELVES WERE DRY, THEY WERE READY FOR THE HARDWARE. WE MADE A “TEMPLATE” FOR THE KNOBS USING ANOTHER PIECE OF WOOD. MY HUSBAND USED THE SAME CLAMPS TO SECURE THIS TEMPLATE AND DRILLED THE HOLES FOR THE SCREWS ONTO EACH DRAWER FRONT. You will see that we added a piece of shoe moulding to the bottom of the shelves where they meet the flooring to also avoid any gaps. I painted this by hand after the shelves were completed.
After the knobs were installed, they were ready for the fun part…styling them WITH ALL OF MY FAVORITE PIECES! I AM JUST AS OBSESSED WITH THESE SHELVES A YEAR LATER. THIS WAS SUCH A FUN AND COST SAVING HACK FOR THE STUDIO. THE SHELVES LOOK LIKE THEY WERE BUILT BY A PROFESSIONAL BUT FOR A FRACTION OF THE COST. I WOULD HIGHLY RECOMMEND THIS TO ANY ONE WITH THE TOOLS AND HANDINESS TO TRY! The runner and decor items are linked on our LTK 🤍
SHOP THE POSt:
You can find sources to my designs and home decor favorites linked directly above on my LIKEtoKNOW.it page.
Be sure to “Follow” to stay up to date on everything Porche and Co. & The Porche Place!
**This Post Contains Affiliate Links**
Do you love what we did with this space? Do some rooms or spaces in your house need some designer help but you aren't sure how to get started?
Check out our various Packages through the link below & let's get started designing your dream room(s) today!
Follow these 3 easy steps to get started today:
1. Select the E-Design package from that best works for your design needs
2. Complete the short Client Design Questionnaire on each space
3. Sit back and watch your dream home come to life!
You will have direct access to your designer via our messenger throughout the whole process.
Multiple revisions are included with each package to ensure you are completely happy with the end result!


